Picture yourself dining at an upscale bistro, savoring each forkful of what appears to be the most exquisitely layered, golden potato creation you’ve ever encountered. Those crispy edges yield to velvety, butter-infused layers that dissolve on your palate. You wonder, “Could I possibly recreate something this sophisticated in my own kitchen?”
The answer is absolutely yes. This seemingly intricate French masterpiece – potato pave – is entirely achievable in your home kitchen, and I’m about to show you exactly how to transform simple ingredients into restaurant-quality elegance.
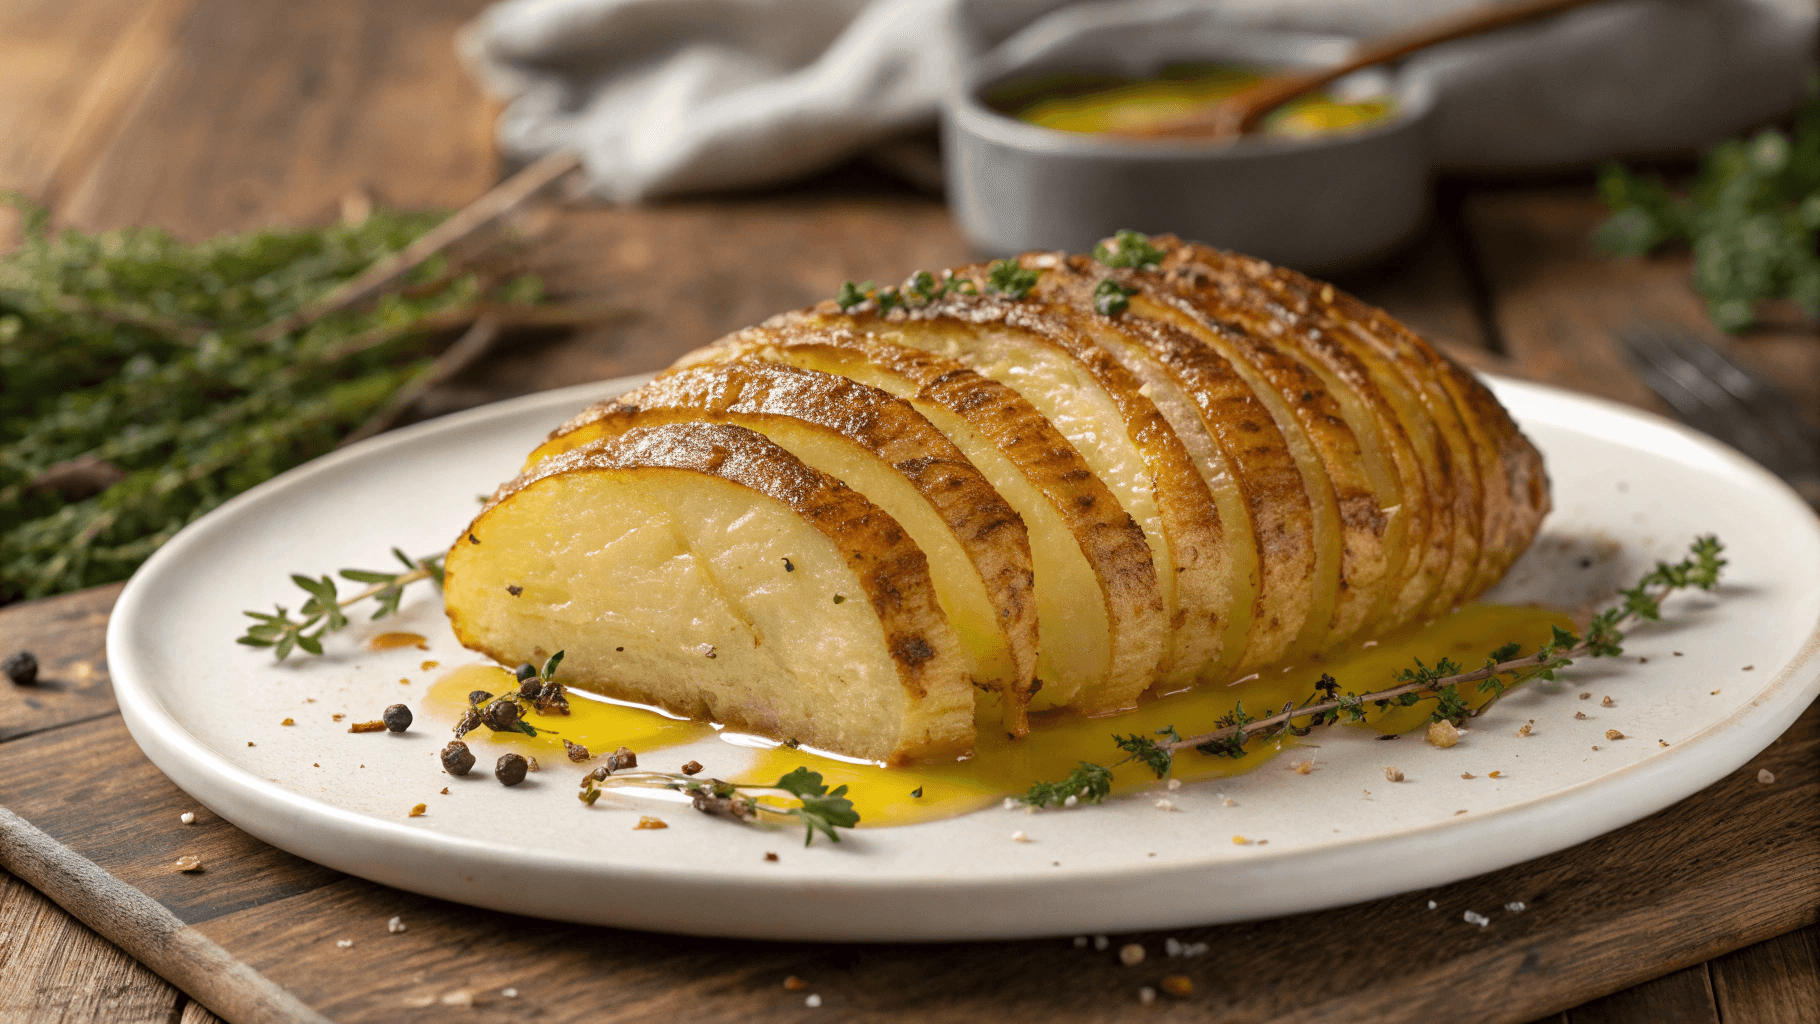
What Makes Potato Pave a Culinary Masterpiece
Potato pave (pronounced “pah-VAY”) derives its name from the French word for cobblestone, referencing its distinctive geometric appearance. This isn’t your typical casserole – it’s a precise culinary technique that transforms humble potatoes into an architectural marvel of flavor and texture.
What distinguishes potato pave from ordinary layered potatoes? The secret lies in meticulous preparation: razor-thin, uniform slices arranged in exact patterns, gentle compression during assembly, and careful temperature control that creates that coveted contrast between the crispy exterior and creamy interior.
Professional chefs prize this dish because it demonstrates technical skill while delivering exceptional visual impact. When you slice through those perfectly aligned layers, you’re revealing the craftsmanship that elevates simple ingredients into something extraordinary.
Essential Ingredients for Perfect Results
Creating exceptional potato pave starts with selecting the right components. Here’s your complete shopping list:
| Ingredient | Quantity | Purpose |
|---|---|---|
| Russet Potatoes | 3-4 large | High starch content for ideal texture |
| Heavy Cream | 1 cup | Rich binding agent |
| Butter | 4 tablespoons | Flavor enhancement and browning |
| Fresh Thyme | 2 sprigs | Aromatic complexity |
| Garlic | 2 cloves, minced | Subtle flavor depth |
| Sea Salt | 1 teaspoon | Essential seasoning |
| Black Pepper | ½ teaspoon | Complementary spice |
Choosing Your Potatoes: Russet varieties work best due to their elevated starch content, which creates that perfect creamy interior. Select potatoes of similar size for consistent cooking, and ensure they’re firm without any soft spots or sprouting eyes.
Cream Selection Matters: Full-fat heavy cream is non-negotiable here. Its richness binds the layers while contributing to that luxurious mouthfeel that distinguishes restaurant-quality potato pave from home attempts.
How to Make Potato Pave Step by Step: The Complete Process
Step 1: Preparation and Setup (15 minutes)
Begin by preheating your oven to 375°F (190°C). Generously butter an 8×8 inch baking dish – glass or ceramic works beautifully for even heat distribution. Gather all ingredients within arm’s reach, as timing becomes crucial once you start slicing.
Step 2: Mastering the Slicing Technique (20 minutes)
This step determines your final result’s success. Wash and peel your potatoes thoroughly, removing every eye and blemish. Pat them completely dry – moisture interferes with proper browning.
The Critical Cut: Slice each potato to exactly 1/8 inch thickness (3mm). A mandoline slicer delivers consistent results, but a sharp chef’s knife works with careful attention. Keep sliced potatoes in cold water to prevent oxidation, but drain and pat dry before use.
Uniformity is paramount here. Inconsistent thickness leads to uneven cooking – some layers become mushy while others remain firm.
Step 3: Creating the Flavor Base (10 minutes)
Gently warm your heavy cream in a small saucepan – don’t let it boil. Add minced garlic and fresh thyme leaves, allowing the flavors to infuse for 5 minutes. Season with salt and pepper, then strain if you prefer a completely smooth texture.
This infused cream becomes the binding agent that transforms individual potato slices into a cohesive, flavorful dish.
Step 4: The Layering Process (25 minutes)
Now comes the meditative part – building your potato pave layer by layer. Start with slightly overlapping potato slices in your prepared dish, creating a foundation that covers the entire bottom. Drizzle a small amount of your seasoned cream over this first layer.
Continue building, maintaining the same overlapping pattern with each subsequent layer. Press gently after every few layers – this compression is crucial for structural integrity. Reserve some cream for the final layer, which ensures proper browning and prevents the top from drying out.
Pro Technique: Maintain consistent overlap patterns throughout. This attention to detail creates those stunning geometric lines visible when you slice the finished dish.
Step 5: Baking to Golden Perfection (45-60 minutes)
Cover your assembled potato pave tightly with aluminum foil and bake for 35 minutes. This initial covered period allows the interior layers to cook through without the top burning.
Remove the foil and increase temperature to 425°F (220°C). Bake an additional 10-15 minutes until the surface achieves that gorgeous golden-brown color. The top should feel firm when gently pressed, and a knife inserted through the center should meet no resistance.
Step 6: The Crucial Cooling Period (30 minutes)
Resist the temptation to slice immediately. Allow your potato pave to rest for at least 20-30 minutes. This cooling period lets the layers set properly, ensuring clean cuts that showcase those beautiful layers instead of a crumbling mess.
When ready to serve, use a sharp, clean knife and wipe the blade between cuts for professional-looking portions.
Professional Chef Secrets for Success

Temperature Control: Room temperature ingredients integrate more smoothly than cold ones. Let your cream and eggs (if using) sit at room temperature for 30 minutes before starting.
The Compression Technique: Professional kitchens often place a weighted sheet pan on top during the initial cooling period. This extra compression creates even tighter layers and cleaner slicing.
Flavor Layering: Some chefs brush each layer with herb-infused butter before adding cream. This technique intensifies flavor throughout the dish rather than concentrating it in the cream.
Common Mistakes and Solutions
Soggy Bottom Syndrome: Too much cream creates a soggy base. Use just enough to lightly coat each layer – you should see potato through the cream, not the reverse.
Uneven Browning: Oven hot spots cause patchy coloring. Rotate your dish halfway through the final browning phase for even results.
Structural Collapse: Insufficient compression or inadequate cooling time leads to layers that fall apart when sliced. Patience during both assembly and cooling prevents this frustration.
Serving and Presentation Ideas
Potato pave pairs beautifully with roasted meats, grilled fish, or as the centerpiece of a vegetarian meal. Its rich, creamy texture complements lighter proteins while its elegant appearance elevates any dinner presentation.
For wine pairings, consider a crisp Chardonnay or light Pinot Noir. The dish’s buttery richness harmonizes beautifully with these varietals’ balanced acidity.
Make-Ahead Strategy: Assemble your potato pave up to 24 hours in advance, cover tightly, and refrigerate. Add 10-15 minutes to the baking time when cooking from cold.
Frequently Asked Questions
Can I use different potato varieties? While russets work best, Yukon Gold potatoes create a creamier texture. Avoid waxy varieties like red potatoes, which won’t achieve the proper consistency.
How do I achieve restaurant-quality presentation? The secret lies in uniform slicing, proper compression, and adequate cooling time. Professional results require patience and attention to detail.
What if my layers separate during slicing? This indicates insufficient binding or premature cutting. Ensure adequate cream distribution and allow full cooling time before serving.
Your Path to Potato Pave Mastery
Mastering how to make potato pave step by step transforms your cooking repertoire, adding a sophisticated technique that impresses guests while satisfying your own culinary ambitions. This French classic demonstrates that extraordinary results come from ordinary ingredients treated with extraordinary care.
Your first attempt might not achieve perfection – that’s completely normal. Each time you prepare potato pave, you’ll refine your technique, developing the intuitive understanding that separates good cooks from great ones.
The satisfaction of presenting this elegant dish, watching faces light up as they experience those perfect layers, makes every moment of careful preparation worthwhile. You’re not just cooking; you’re creating an experience that lingers in memory long after the last bite.
Ready to begin your potato pave journey? Gather your ingredients, sharpen your knife, and prepare to discover just how rewarding mastering this classic French technique can be. Your kitchen is about to become the stage for culinary magic that rivals any fine dining establishment.
Start today, and by tomorrow evening, you’ll be serving potato pave that showcases your newfound skills while creating moments of pure dining pleasure for everyone at your table.
