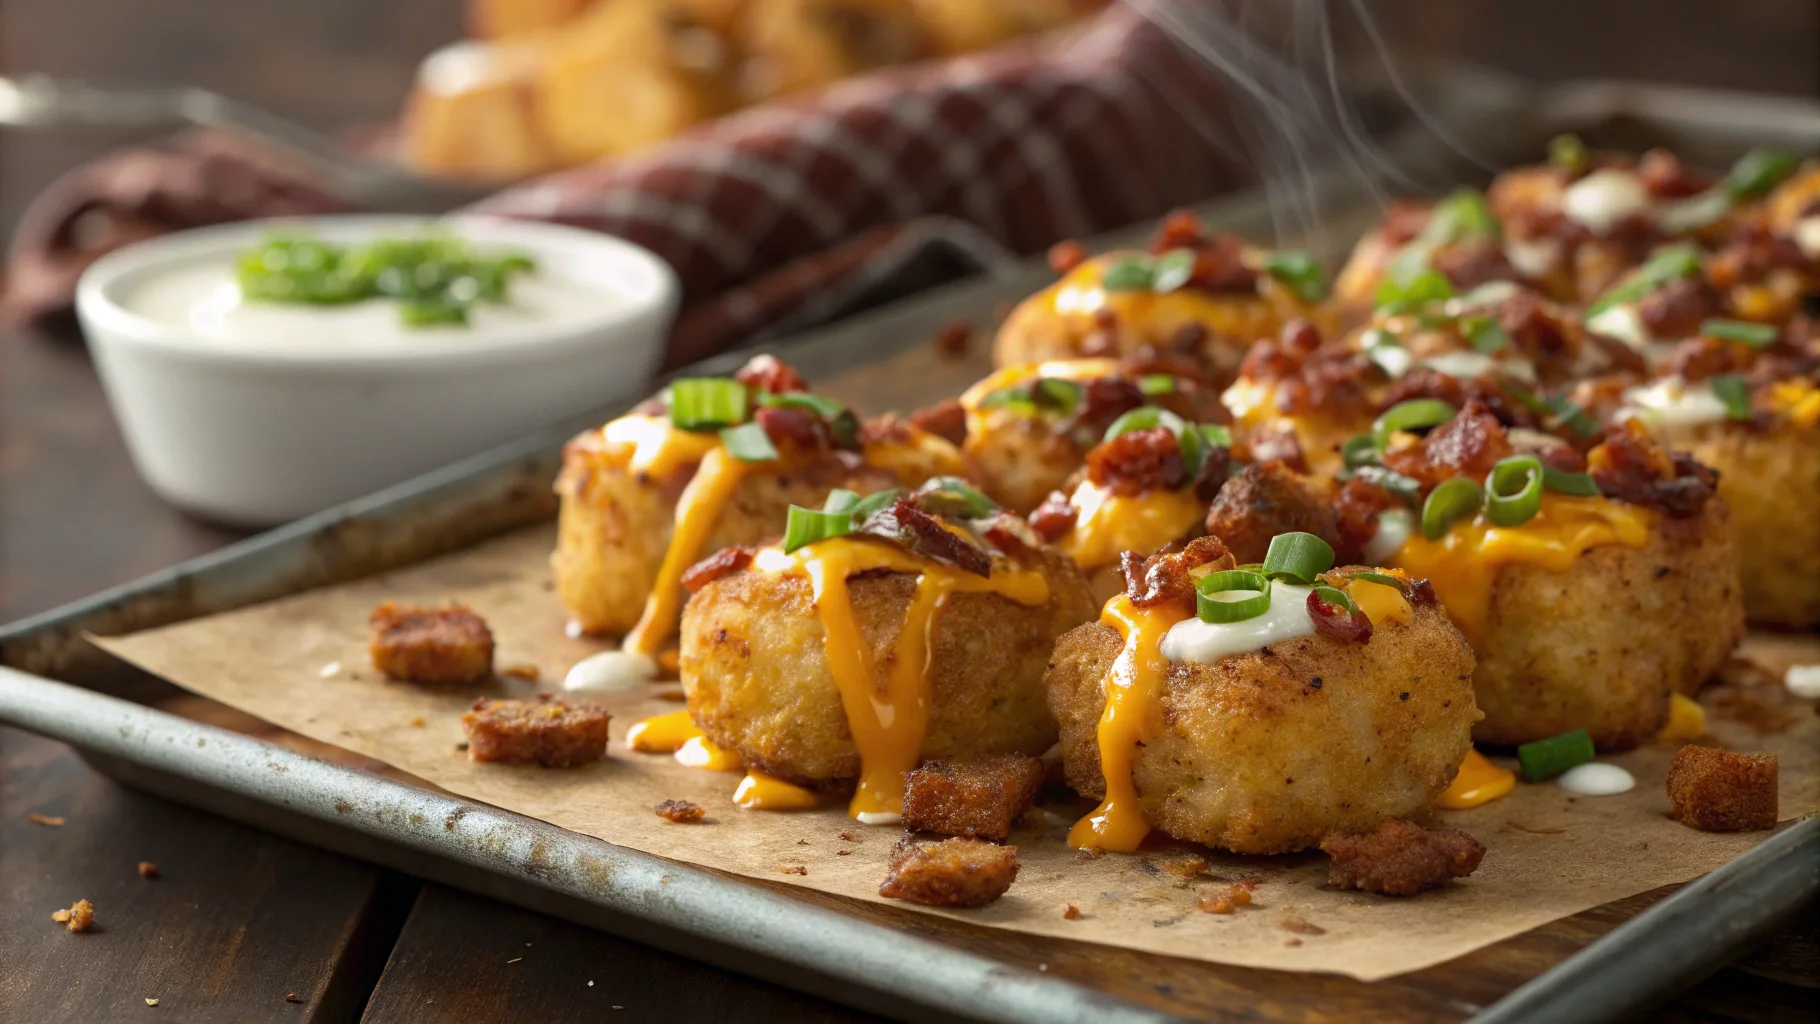
Picture this: A steaming platter arrives at your table, golden-brown potato nuggets piled high, draped in melted cheese that stretches with each forkful. Crispy bacon bits add savory depth while green onions provide a fresh pop of color and flavor. The aroma alone triggers an immediate mouth-watering response. This isn’t some fancy restaurant creation—these are homemade loaded tater tots, fresh from your own oven.
Introduction: More Than Just a Side Dish
Remember childhood meals when tater tots appeared on your plate like little treasures? That first bite—crunchy exterior yielding to fluffy potato inside—could transform an ordinary dinner into something special. Now imagine elevating those humble tots into a meal-worthy creation that satisfies grown-up cravings while preserving that nostalgic comfort.
Loaded tater tots bridge the gap between convenience and culinary delight. They’ve evolved from cafeteria staple to versatile canvas for creative toppings and flavor combinations. Whether you’re hosting friends for the big game, need a crowd-pleasing appetizer that doesn’t require hours in the kitchen, or simply crave heartwarming comfort food after a demanding day, these oven-baked loaded tots deliver satisfaction without complicated techniques or hard-to-find ingredients.
- Bist Amazon Picks:
The beauty lies in their simplicity—frozen tater tots transformed through thoughtful preparation and complementary toppings. By following these five straightforward steps, you’ll achieve restaurant-quality loaded tots without deep-frying or special equipment. Let’s dive into creating this irresistible dish that proves sometimes the most straightforward recipes bring the greatest joy to your table.
Why You’ll Love These Oven-Baked Loaded Tater Tots
Before jumping into preparation methods, understanding what makes these loaded tots special helps appreciate the magic behind their appeal. These aren’t just any potato snacks—they represent the perfect intersection of convenience, customization, and craveable flavors.
First, consider their crowd-pleasing nature. Have you ever met someone who doesn’t enjoy crispy potatoes topped with melted cheese? These loaded tots transcend age groups and picky eater boundaries. Children reach for them enthusiastically while adults appreciate their nostalgic charm combined with sophisticated flavor combinations.
Time efficiency represents another tremendous advantage. From freezer to table in under half an hour, these loaded tots require minimal active preparation. Most of the cooking happens unsupervised in your oven, freeing you to focus on other dishes or simply relax while delicious aromas fill your kitchen.
Perhaps most importantly, you control every element. Unlike restaurant versions that might arrive soggy or drowning in processed cheese sauce, your homemade creation maintains the perfect balance between crispy exterior and complementary toppings. Customize heat levels, cheese varieties, and garnishes according to your household’s preferences without compromising quality.
Choosing oven-baking over traditional deep-frying means significantly less oil and mess. You’ll achieve golden-brown perfection without dealing with hot oil disposal or lingering fried food smells. This cooking method delivers crispiness while keeping the focus on the toppings that transform simple tots into a memorable meal.
Essential Ingredients for Perfect Loaded Tater Tots
Success begins with quality components. While the concept remains straightforward, thoughtful ingredient selection elevates your loaded tots from good to spectacular. Here’s what you’ll need:

| Ingredient | Amount | Notes |
|---|---|---|
| Frozen tater tots | 1 bag (32 oz) | Select a reputable brand with whole potato ingredients listed first |
| Shredded cheddar cheese | 1½ cups | Freshly grated provides superior melting properties compared to pre-shredded |
| Bacon | 6-8 strips, cooked and crumbled | Cook until crisp but not burnt for optimal texture |
| Green onions | 3-4, thinly sliced | Include both white and green parts for flavor depth |
| Sour cream | ½ cup | Full-fat delivers richest flavor, but light works too |
| Seasonings | To taste | Garlic powder, paprika, salt, and freshly cracked pepper |
| Optional toppings | As desired | Pickled jalapeños, diced ripe tomatoes, avocado chunks |
The foundation—frozen tater tots—deserves particular attention. Not all brands deliver equal quality. Examine ingredient lists and choose versions containing minimal additives. The best options list potatoes first and contain recognizable ingredients rather than chemical preservatives or artificial flavors.
For cheese, consider grating your own rather than using pre-packaged shredded varieties. Pre-shredded cheese contains anti-caking agents that can interfere with proper melting. A few extra minutes with a box grater rewards you with dramatically improved texture and flavor in the finished dish.
When selecting bacon, thickness matters. Medium-thick slices provide substantial bites without overwhelming other components. For a lighter option, turkey bacon works beautifully, delivering smoky notes with reduced fat content.
Equipment You’ll Need
Fortunately, loaded tater tots require minimal specialized equipment. Gather these basic kitchen tools before beginning:
- Large baking sheet with rimmed edges to prevent tots from sliding off
- Parchment paper or cooking spray for easy release and simplified cleanup
- Mixing bowl for combining seasonings or preparing certain toppings
- Sharp cutting board and knife for ingredient preparation
- Measuring cups and spoons for consistent results
A rimmed baking sheet provides ample surface area for tots to crisp properly without overcrowding. For enhanced results, consider using a dark-colored baking sheet which promotes better browning. If you own a quarter-sheet or half-sheet commercial-style pan, its sturdy construction distributes heat beautifully for consistent cooking.
How to Make Loaded Tater Tots in the Oven: 5 Easy Steps
Step 1: Prepare Your Oven and Tots
Begin by positioning your oven rack in the middle position and preheating to 425°F (220°C). This slightly higher temperature than package directions creates extra-crispy exteriors without drying the interiors.
Line your baking sheet with parchment paper, creating a non-stick surface that promotes even browning. Alternatively, a light coating of cooking spray works effectively. The key here involves preventing sticking while allowing heat circulation around each tot.
Arrange frozen tater tots across the prepared surface, maintaining separation between pieces. Resist the temptation to pile or overlap them—crowding prevents proper crisping and results in inconsistent texture. Instead, use multiple baking sheets if necessary to accommodate your desired quantity.
For professional-level results, arrange tots in straight lines rather than random scattering. This methodical approach ensures even cooking and simplifies topping distribution later. Leave approximately ¼-inch between each piece, allowing hot air circulation that produces the golden exterior that makes these treats irresistible.
Step 2: Season for Maximum Flavor
While many cooks skip this crucial step, seasoning your tater tots before baking dramatically improves flavor penetration. Create a simple blend of ½ teaspoon garlic powder, ½ teaspoon paprika, ¼ teaspoon salt, and a generous pinch of freshly ground black pepper.
Sprinkle this mixture evenly across the arranged tots. For ideal coverage, hold your hand approximately 10 inches above the baking sheet while sprinkling, allowing seasonings to distribute naturally rather than creating concentrated spots.
After seasoning, gently shake the baking sheet or use tongs to flip several tots, ensuring seasonings contact all surfaces. For enhanced adherence, lightly mist the frozen tots with cooking spray before applying seasonings—this creates a slightly tacky surface that captures and holds spices during baking.
Consider this seasoning recommendation as your starting point rather than rigid requirement. Adventurous cooks might incorporate dried ranch seasoning, Cajun spice blends, or Italian herb mixtures depending on their planned toppings and flavor preferences.
Step 3: Initial Bake for Crispy Perfection
Position your baking sheet in the preheated oven, confirming the temperature has fully reached 425°F before insertion. Temperature accuracy significantly impacts texture development—too low means soggy tots, while too high risks burning exteriors before interiors heat through.
Set your timer for 18 minutes as your baseline cooking time. Individual ovens vary significantly, so visual cues ultimately determine doneness. At approximately the 10-minute mark, open the oven and use a spatula to carefully flip and redistribute the tots. This extra step ensures uniform browning on multiple surfaces rather than just the bottoms.
Watch for golden-brown coloration developing across most surfaces. Properly cooked tots should resist slightly when pressed with a utensil—if they feel mushy or compressible, they require additional cooking time. Conversely, excessive darkening indicates they’ve reached optimal crispness and should progress to the topping stage.
Throughout this process, resist checking too frequently as each oven opening releases heat and extends cooking time. Instead, rely on your oven light when possible, saving door openings for the essential mid-point flip.
Step 4: Add Your Toppings
Once your tots achieve golden perfection, timing becomes crucial. Remove the baking sheet while maintaining oven temperature. Working efficiently, distribute shredded cheese evenly across the hot surface, ensuring consistent coverage without creating excessive piles that melt unevenly.
Immediately follow with crumbled bacon, dispersing it so each serving contains adequate portions. For photo-worthy presentation, reserve approximately one-third of your bacon crumbles for final garnishing after melting the cheese.
Return the loaded tots to the oven, positioning the rack slightly higher than before if possible. This placement intensifies top heat, creating beautifully melted cheese with slight browning around edges—similar to brick-oven pizza effects.
Watch carefully during this brief heating period, typically 3-5 minutes. Perfect cheese melting exhibits complete liquefaction without separation or burning. When cheese bubbles across the surface and barely begins browning at edges, your creation has reached optimal serving condition.
Step 5: Garnish and Serve Your Loaded Tater Tots
Remove your masterpiece from the oven and begin final garnishing while still hot. Immediately scatter sliced green onions across the surface, allowing residual heat to slightly wilt them without cooking completely. This timing preserves their vibrant color while mellowing harsh onion notes.
Add any temperature-sensitive toppings now—diced tomatoes, avocado chunks, or additional reserved bacon pieces. For serving flexibility, consider placing certain components like sour cream, hot sauce, or ranch dressing in small side dishes, allowing guests to customize portions according to personal preference.
Transfer the loaded tots to a serving platter or individual plates while still hot. For memorable presentation, consider serving on parchment paper-lined baskets or wooden boards that highlight their casual, shareable nature.
Time matters significantly at this stage—serve immediately while cheese remains perfectly melted and tots maintain their delightful crispness. Unlike some dishes that benefit from resting period, loaded tots reach peak deliciousness straight from the oven.
Delicious Variations to Try

The basic loaded tot formula provides endless opportunities for creative interpretation. Consider these inspired variations for your next batch:
Tex-Mex Loaded Tater Tots
Transform your creation with southwestern flair by incorporating 2 teaspoons of taco seasoning into your spice mixture before baking. Replace standard cheddar with Mexican-style cheese blend, then top with seasoned ground beef or shredded chicken after the initial bake. Complete your masterpiece with black beans, diced tomatoes, and cilantro. Serve with fresh guacamole, zesty salsa, and lime wedges for authentic border-inspired flavor.
Buffalo Chicken Loaded Tater Tots
For heat-lovers, create this sports-bar favorite at home. Toss 1½ cups shredded rotisserie chicken with ⅓ cup buffalo wing sauce until thoroughly coated. After your tots achieve initial crispness, top with the prepared chicken and blue cheese crumbles before returning to the oven. Finish with drizzled ranch dressing and thinly sliced celery leaves for the quintessential buffalo experience without messy wings.
Breakfast Loaded Tater Tots
Reimagine morning potatoes with this brunch-worthy variation. Prepare tots as directed, then crown with scrambled eggs and crumbled breakfast sausage before adding cheese and returning to the oven. Finish with diced bell peppers and hot sauce or hollandaise drizzle. This hearty creation bridges breakfast and lunch perfectly, ideal for weekend gatherings or meal prep for busy weekday mornings.
Storage and Reheating Tips
While loaded tots reach their pinnacle fresh from the oven, proper storage techniques preserve their charm for limited periods. Transfer completely cooled leftovers to airtight containers, separating layers with parchment paper to prevent sogginess. Refrigerate for maximum freshness retention, consuming within two days for optimal texture and flavor.
When reheating, avoid microwave methods that inevitably produce disappointing sogginess. Instead, preheat your oven to 375°F and arrange leftovers in a single layer on a baking sheet. Heat for 5-7 minutes until thoroughly warmed and recrisped around edges. Consider adding fresh toppings after reheating to revitalize the presentation.
Unfortunately, freezing assembled loaded tots proves generally unsuccessful—thawed versions develop unpleasant textural changes and moisture inconsistencies. Rather than freezing completed dishes, consider partially preparing components separately when planning make-ahead meals.
Frequently Asked Questions About Loaded Tater Tots
Can I make loaded tater tots ahead of time?
While complete advance preparation sacrifices the signature textural contrast between crispy tots and melty toppings, component preparation streamlines your cooking process. Cook and crumble bacon, shred cheese, and prepare garnishes up to two days ahead, storing separately in refrigerated containers. This approach preserves quality while significantly reducing day-of preparation time.
How do I make my oven-baked loaded tater tots extra crispy?
Exceptional crispiness depends on proper spacing and circulation. Beyond arranging tots with separation between pieces, consider elevating them on a wire rack positioned atop your baking sheet. This technique allows hot air circulation underneath each piece, producing restaurant-quality crispness on all surfaces rather than just the tops and bottoms. Additionally, extending initial baking time by 2-3 minutes before adding toppings develops deeper golden color and crunchier texture.
Can I use an air fryer to make loaded tater tots?
Absolutely! Air fryers excel at creating exceptionally crispy loaded tater tots with reduced cooking time. Preheat your air fryer to 400°F, then arrange tots in a single layer within the basket without overcrowding. Cook for approximately 10-12 minutes, shaking halfway through. Add toppings and continue cooking for 2-3 additional minutes until cheese melts completely. Depending on your air fryer capacity, multiple batches may be necessary for larger servings.
What’s the best cheese for loaded tater tots?
Sharp cheddar provides classic flavor with excellent melting properties, but numerous alternatives deliver delightful results. Consider pepper jack for pleasant heat, smoked gouda for sophisticated depth, or combine multiple varieties for complex flavor profiles. Regardless of selection, freshly shredded cheese melts more uniformly than pre-packaged versions containing anti-caking agents.
Are loaded tater tots gluten-free?
Many commercial tater tot brands produce naturally gluten-free products, but manufacturing processes vary significantly. Always verify packaging information when preparing for individuals with gluten sensitivities or celiac disease. Additionally, examine all topping ingredients carefully—particularly pre-packaged bacon which occasionally contains gluten-based additives or seasonings.
Conclusion: Elevate Your Comfort Food Game with Loaded Tater Tots
Transforming humble frozen tater tots into craveable loaded creations represents culinary alchemy at its most accessible. Through five straightforward steps, you’ve learned to create crowd-pleasing comfort food combining nostalgic appeal with grown-up flavors. The versatility of this foundation recipe invites endless personalization while maintaining the essential elements that define truly outstanding loaded tots—crispy exteriors, complementary toppings, and that perfect balance between familiar comfort and exciting flavor combinations.
What truly sets homemade loaded tater tots apart from commercial versions isn’t complicated techniques or exotic ingredients, but rather thoughtful preparation and quality components. By controlling every element from seasoning to cheese selection, you create exactly the flavor profile your household craves without compromising nutrition or quality.
Tonight, transform ordinary dinner into something memorable with these loaded tater tots. Gather ingredients, preheat your oven, and embrace the simple joy of creating something delicious from everyday components. Share your creations with friends and family—perhaps even setting up a custom topping bar for personalized variations—and watch as this humble potato dish becomes requested regularly in your home.
Ready to elevate your comfort food game? These loaded tater tots await your creative touch. Share your favorite topping combinations or preparation tips in the comments below, and don’t forget to save this recipe for your next gathering. Your search for the perfect crowd-pleasing appetizer or satisfying main dish ends here!
