Remember that magical moment when your spoon first broke through the vanilla wafer topping of grandma’s banana pudding? That satisfying crunch giving way to velvety smoothness beneath? Some childhood treats simply refuse to release their hold on our hearts—and taste buds.
Summer afternoons call for something special, something that marries cherished memories with cool refreshment. This banana pudding ice cream recipe delivers exactly that—transforming familiar flavors into a frozen delight that’ll transport you straight back to those Sunday gatherings on the porch.
The beauty lies in its simplicity. No fancy equipment required. No complicated techniques to master. Just five straightforward steps separating you from dessert heaven, using ingredients likely already nestled in your kitchen cabinets. Within hours, you’ll be savoring spoonfuls of creamy banana goodness studded with those unmistakable vanilla wafer morsels that somehow taste exactly like childhood memories feel.
Why You’ll Fall in Love With This Banana Pudding Ice Cream Recipe
Before diving into the how-to, let’s talk about why this recipe deserves a permanent spot in your dessert rotation. Unlike store-bought alternatives that often miss the mark on authentic flavor, this homemade version captures the essence of traditional banana pudding while offering several advantages:
- Equipment-free luxury – No ice cream maker collecting dust in your cabinet? No problem! This no-churn method delivers professional-quality results without specialized gadgets.
- Pantry-friendly ingredients – Just seven everyday items transform into something extraordinary.
- Texture control – Prefer chunky banana pieces or smooth creaminess? You decide exactly how your dessert feels on the tongue.
- Make-ahead convenience – Perfect for entertaining or keeping a special treat at the ready for impromptu celebrations.
- Kid-approved process – Little hands can help with safe steps like crushing cookies or mashing bananas.
- True-to-tradition flavor – The combination of real bananas and vanilla pudding mix creates that classic taste you’re craving.
What You’ll Need: Banana Pudding Ice Cream Ingredients
Quality ingredients make all the difference in a recipe this simple. Each component plays a crucial role in the final flavor profile:
Ingredients Table

| Ingredient | Quantity | Notes |
|---|---|---|
| Ripe bananas | 3 medium (about 1½ cups mashed) | Look for peels with brown speckles for natural sweetness |
| Heavy cream | 2 cups | Keep refrigerated until ready to whip |
| Sweetened condensed milk | 1 (14 oz) can | The secret to smooth, no-churn texture |
| Vanilla instant pudding mix | 1 (3.4 oz) package | Creates authentic pudding flavor without cooking |
| Pure vanilla extract | 1 teaspoon | Avoid imitation for best results |
| Salt | Pinch | Balances sweetness and enhances flavor complexity |
| Vanilla wafers | 2 cups (about 60 cookies) | Traditional Nilla brand works wonderfully |
Equipment Essentials
You’ll need a few basic kitchen tools to bring this dessert to life:
- Large mixing bowl (preferably chilled)
- Electric mixer (stand or handheld)
- Loaf pan or freezer-safe container
- Plastic wrap
- Potato masher or fork
- Rubber spatula for folding
The 5-Step Banana Pudding Ice Cream Process
Step 1: Prepare Your Bananas for Maximum Flavor
The foundation of outstanding banana pudding ice cream begins with selecting the perfect fruit. Bright yellow bananas with brown freckles indicate peak ripeness—when natural sugars have developed fully but before turning overly mushy.
Once you’ve gathered your perfectly ripened bananas:
- Remove peels completely
- Place fruit in a medium bowl
- Mash thoroughly using a potato masher or fork until your desired consistency emerges
- Consider adding a teaspoon of lemon juice if you prefer to minimize browning
Pro Tip: Don’t shy away from those nearly-black bananas languishing on your counter! The darker the peel, the sweeter and more pronounced banana flavor you’ll achieve in your finished dessert. Just avoid any with signs of fermentation or off-putting odors.
Step 2: Create the Creamy Base
The magic of no-churn ice cream happens when air gets incorporated into fat-rich ingredients. That’s why proper whipping technique matters tremendously here:
- Begin with a chilled bowl and beaters for maximum volume when whipping cream
- Beat heavy cream on medium-high speed until stiff peaks form (the cream should stand tall when beaters are lifted)
- In a separate bowl, combine sweetened condensed milk, vanilla pudding powder, vanilla extract, and that tiny pinch of salt
- Stir until completely smooth with no powder pockets
- Gently fold your mashed bananas into this sweetened mixture
- Using a rubber spatula, carefully incorporate the whipped cream using a down-and-over motion to preserve air bubbles
Pro Tip: Patience pays delicious dividends during the folding process! Rushing creates a deflated base, while gentle, methodical folding maintains that luxurious mousselike consistency that distinguishes exceptional homemade ice cream from disappointing dense varieties.
Step 3: Add Those Classic Vanilla Wafers
Texture contrast elevates this dessert from simply good to absolutely unforgettable. The cookie element provides that signature banana pudding experience through varying degrees of crunch and softness:
- Place about two-thirds of your vanilla wafers in a sealed bag
- Use a rolling pin to crush into pieces ranging from small crumbs to quarter-sized chunks
- Set aside approximately ½ cup of these crushed wafers for topping
- Gently fold the remaining crushed cookies into your ice cream base
- Reserve several whole wafers for garnishing individual servings later
Pro Tip: Creating varying textures among your crushed cookies delivers the most authentic banana pudding experience. Some pieces will soften completely during freezing, creating those beloved pudding-soaked morsels, while larger chunks maintain pleasant resistance when bitten.
Step 4: Freeze to Perfection
Proper freezing technique prevents the ice crystal formation that ruins many homemade frozen desserts:
- Transfer your mixture into a standard 9×5-inch loaf pan or similar freezer-safe container
- Use your spatula to create a level surface
- Sprinkle reserved crushed vanilla wafers evenly across the top
- Cover with plastic wrap, pressing directly onto the surface to eliminate air exposure
- Freeze undisturbed for at least 6 hours (overnight yields ideal consistency)
Pro Tip: For extra-smooth results reminiscent of professionally churned ice cream, remove from freezer after two hours and vigorously stir to break up any developing ice crystals. Return to freezer immediately and continue freezing until firm.
Step 5: Serve and Enjoy Your Banana Pudding Ice Cream
The waiting ends! Now comes the reward for your patience:
- Remove from freezer approximately 10 minutes before serving to achieve the perfect scoopable texture
- Use a warmed ice cream scoop for picture-perfect portions
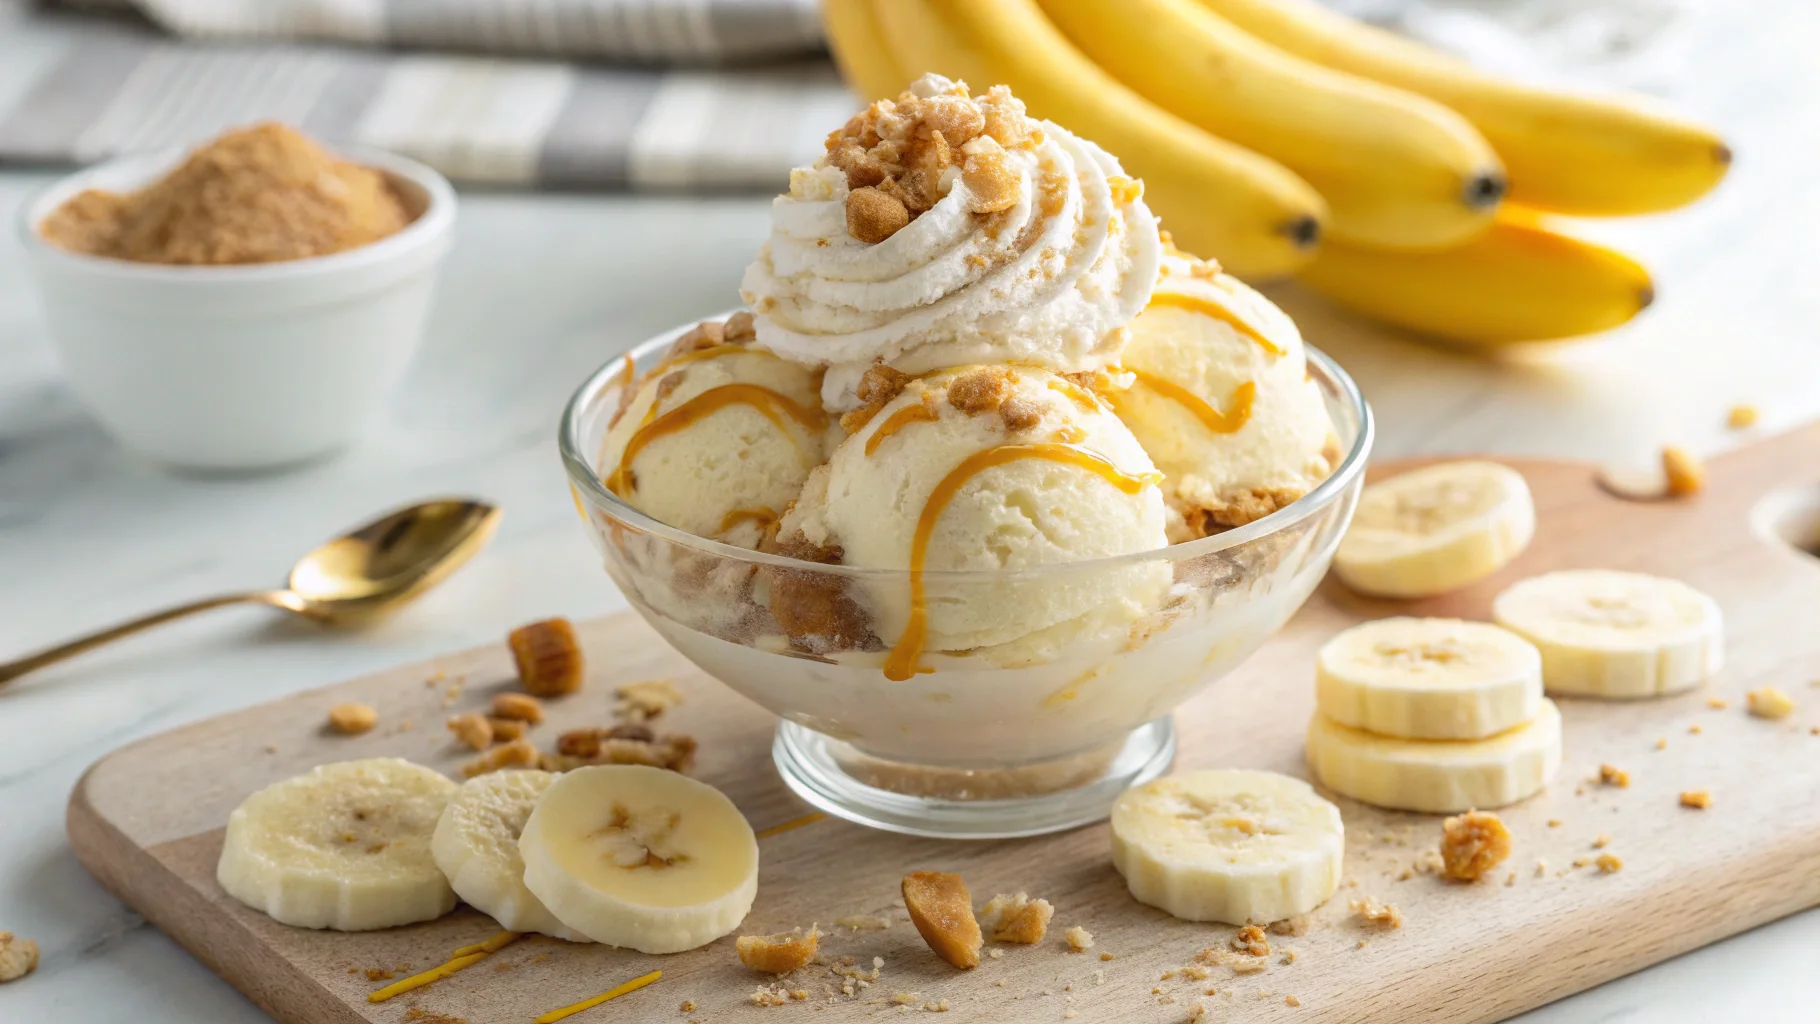
- Garnish with reserved whole vanilla wafers and fresh banana slices if desired
- Consider drizzling with caramel sauce or a dusting of crushed wafer crumbs for elegant presentation
Pro Tip: For entertaining, create a show-stopping dessert by layering scoops between additional vanilla wafers and banana slices in clear glasses. The visual impact rivals fancy restaurant desserts while maintaining that comforting homemade quality everyone cherishes.
Customization Ideas for Your Banana Pudding Ice Cream
While perfection needs no improvement, personalizing recipes creates memorable signature desserts your friends and family will request repeatedly:
Mix-In Options to Elevate Your Dessert
- Chocolate enthusiasts: Fold in ⅓ cup mini chocolate chips or create chocolate sauce ribbons throughout
- Caramel aficionados: Warm ¼ cup thick caramel sauce until pourable, then create swirls throughout nearly-frozen mixture
- Texture seekers: Incorporate ⅓ cup toasted chopped pecans or walnuts for delightful crunch
- Southern traditionalists: Crumble homemade chess squares or pound cake for authentic regional flair
- Cookie collectors: Experiment with golden sandwich cookies for complementary vanilla richness
Storage Tips for Homemade Banana Pudding Ice Cream
Proper storage extends enjoyment of your culinary creation:
- Always use containers with tight-fitting lids
- Keep plastic wrap pressed against the surface before adding lids to prevent freezer burn
- Store toward the back of your freezer where temperature remains most consistent
- Enjoy within two weeks for optimal flavor and texture
- When scooping becomes difficult, allow 15 minutes in refrigerator rather than room temperature for controlled softening
Why This Banana Pudding Ice Cream Recipe Works
Understanding the science behind this method helps appreciate its reliability. Three key elements work harmoniously:
First, whipped cream incorporates crucial air bubbles that create the foundation for smooth texture. Second, sweetened condensed milk provides concentrated sweetness while its high sugar content lowers the freezing point, preventing rock-hard results. Finally, instant pudding mix contains modified food starch that absorbs excess moisture that would otherwise form ice crystals.
This perfect balance of ingredients creates a foolproof formula for creamy, scoopable perfection every time—without requiring constant churning or monitoring during the freezing process.
Nutritional Information (Per Serving)
Based on eight servings
- Calories: 385
- Fat: 21g
- Carbohydrates: 45g
- Protein: 5g
- Sugar: 35g
Frequently Asked Questions About Banana Pudding Ice Cream
Can I make this banana pudding ice cream without an ice cream maker?
Absolutely! That’s the beauty of this particular recipe. The combination of whipped cream and sweetened condensed milk creates a perfectly smooth, creamy texture without any churning required. You’ll achieve professional-quality results without investing in single-purpose kitchen equipment.
How ripe should the bananas be for banana pudding ice cream?
Seek out bananas with significant brown spotting across the peel—what some might consider “overripe” for eating fresh. These deliver pronounced banana flavor and natural sweetness that permeates your ice cream beautifully. Those brown spots indicate the starches have converted to sugars, intensifying flavor dramatically.
Can I use banana pudding mix instead of vanilla for this ice cream recipe?
Certainly! Banana-flavored pudding mix intensifies the fruit notes and creates a more pronounced yellow color reminiscent of traditional banana pudding. However, vanilla pudding allows the fresh banana flavor to shine through without artificial overtones. Both options produce delicious results—choose based on your preference for subtle versus bold banana taste.
How long does homemade banana pudding ice cream last in the freezer?
When properly stored in an airtight container with plastic wrap pressed directly against the surface, your banana pudding ice cream maintains peak quality for up to two weeks. Beyond that timeframe, texture may gradually deteriorate as ice crystals form, though safety isn’t compromised for several months.
Can I make this banana pudding ice cream recipe dairy-free?
Yes! Substitute coconut cream (not coconut milk) for heavy cream, and use dairy-free condensed coconut milk in place of traditional sweetened condensed milk. Many vanilla wafers contain butter, so check labels carefully or substitute with dairy-free cookies. The texture will differ slightly from the original but remains deliciously creamy.
Do the vanilla wafers get soggy in the banana pudding ice cream?
They transform beautifully during freezing—some portions soften completely into pudding-soaked morsels while others maintain slight crunch, creating that signature banana pudding texture contrast. For maximum crispness, reserve some crushed wafers to sprinkle on immediately before serving.
A Perfect Blend of Nostalgia and Indulgence
This banana pudding ice cream brings together cherished flavors in a refreshing format perfect for warm-weather gatherings or simple weeknight treats. The marriage of creamy banana base with iconic vanilla wafer crunch creates an experience that transcends ordinary frozen desserts.
What makes this recipe truly special lies beyond its simplicity—it’s the way each spoonful connects us to memories of family gatherings, southern hospitality, and the simple joy of classic American desserts. While trends come and go, these timeless flavor combinations remain beloved across generations.
Don’t keep this recipe to yourself! Share your banana pudding ice cream creation on social media with #BananaPuddingIceCreamBliss or tag your friends for your next dessert gathering. Better yet, package pints in decorative containers as heartfelt homemade gifts that deliver both flavor and nostalgia in equal measure.
Ready to create this crowd-pleasing dessert? Your kitchen already contains most ingredients needed to begin. Those spotty bananas on your counter are practically begging to transform into something extraordinary! Start now and by tomorrow, you’ll be enjoying spoonful after spoonful of creamy, cookie-studded perfection.
What childhood dessert would you like to see transformed into ice cream next? Leave a comment below with your suggestions!
