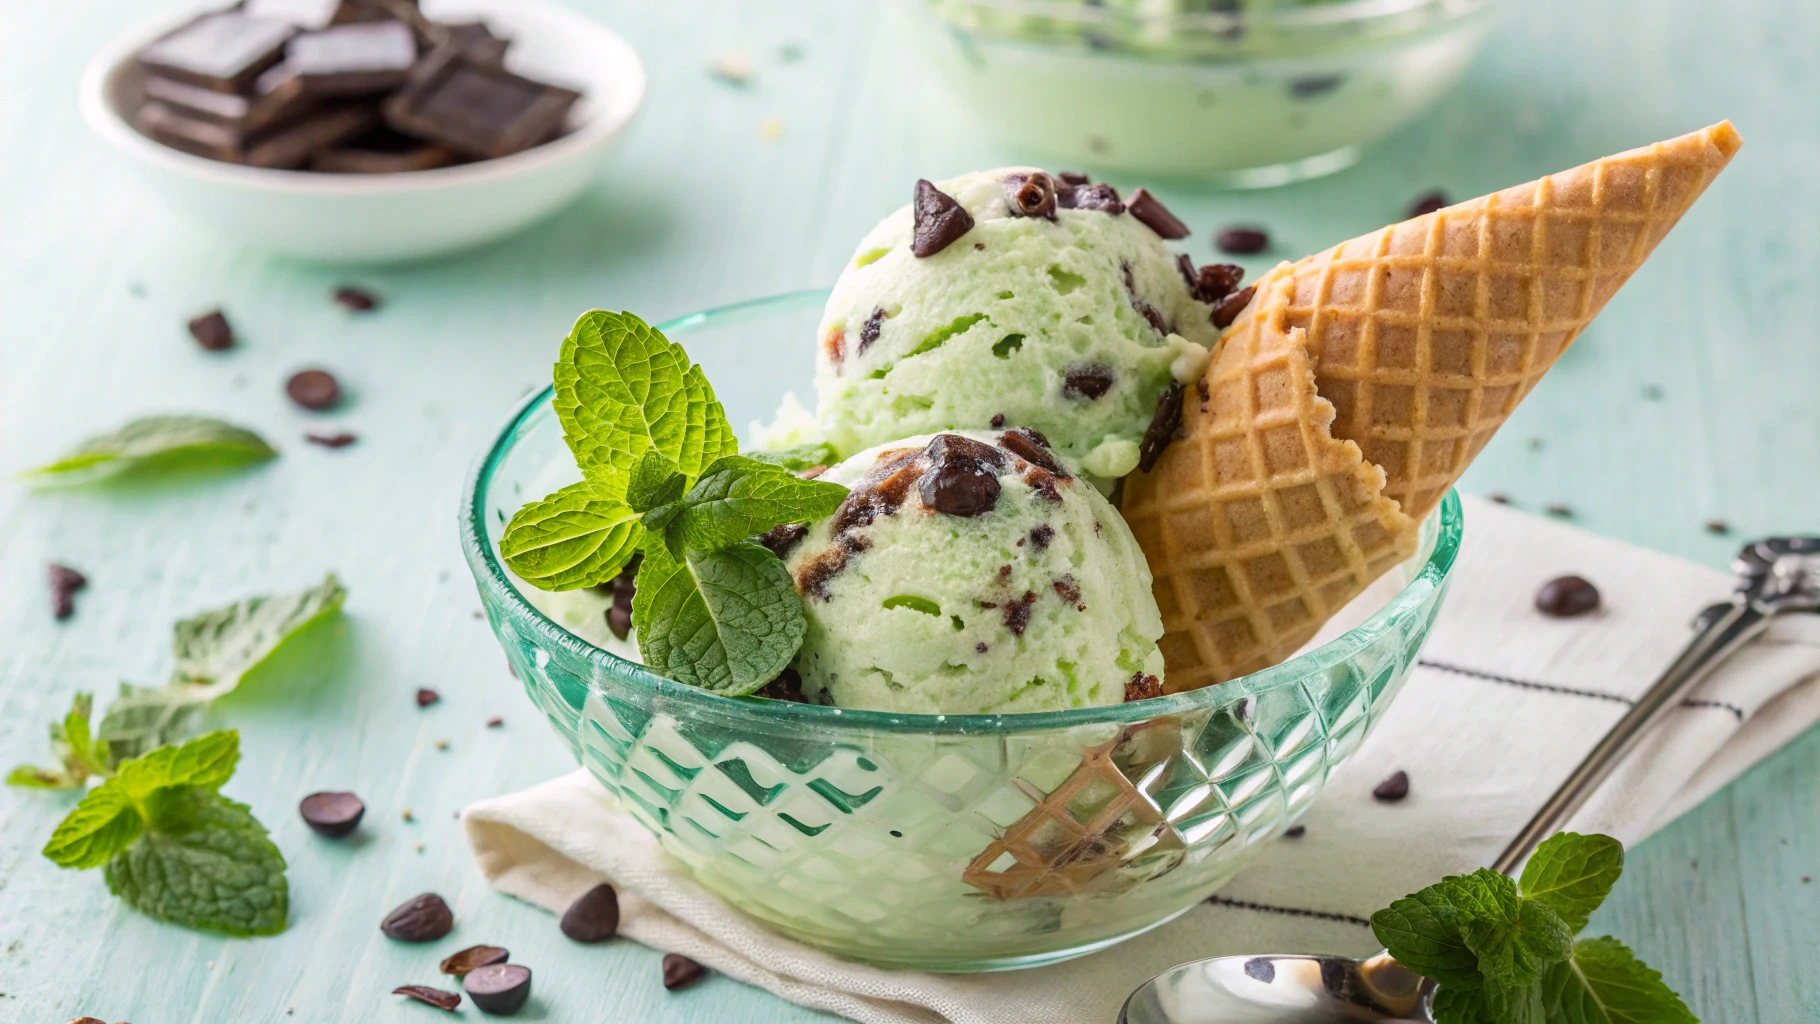
Remember that magical moment when mint chocolate chip ice cream first graced your taste buds? That perfect blend of cool refreshment and chocolate decadence likely remains etched in your memory bank. Perhaps it happened during a sweltering summer afternoon, the kind where perspiration dots your forehead and relief seems impossibly distant. Then came that first spoonful—verdant, aromatic, and studded with chocolate treasures—delivering an instant chill that somehow managed to both calm and excite your senses.
Creating this beloved frozen delicacy at home isn’t just about satisfying a craving; it’s about rekindling those cherished moments while crafting new memories alongside friends and family. The homemade approach yields something profoundly more extraordinary than anything commercially produced—ice cream with unparalleled creaminess, vibrant mint flavor that dances across your palate, and chocolate pieces that provide the perfect counterpoint in both taste and texture.
Why Homemade Mint Chocolate Chip Ice Cream Reigns Supreme
Store-bought varieties certainly offer convenience, but when you take the reins in your own kitchen, something magical happens. Homemade mint chocolate chip ice cream elevates this classic treat from merely pleasant to absolutely transcendent.
When you craft ice cream yourself, you gain mastery over every element. You determine precisely how sweet the base should be—perhaps you prefer a subtler sweetness that allows the mint to take center stage. Speaking of mint, you choose whether to employ fresh leaves for a garden-bright flavor or opt for extract when convenience calls. The chocolate selection falls squarely within your domain as well—will you incorporate bittersweet morsels, milk chocolate chunks, or perhaps an artisanal dark chocolate that transforms each bite into something extraordinary?
Beyond customization, homemade production delivers remarkable value. Premium ice cream brands often command $7-$10 per pint, whereas creating your own typically costs half that amount while yielding superior quality. Plus, the satisfaction derived from watching loved ones delight in something crafted by your own hands? That remains utterly priceless.
The Science Behind Perfect Creamy Mint Chocolate Chip Ice Cream
Understanding the chemistry behind ice cream production empowers you to achieve professional-quality results. Luxurious mouthfeel doesn’t happen by accident—it emerges through careful attention to several critical factors.
Fat Content: The Foundation of Creaminess
Fat molecules within your ice cream base perform double duty: they trap air during churning while simultaneously coating your taste buds, creating that velvety sensation we associate with premium frozen desserts. This explains why recipes featuring heavy cream (with approximately 36-40% fat content) yield noticeably creamier results than those relying predominantly on lower-fat alternatives.
Emulsification: Creating Harmony Among Ingredients
Proper emulsification—the process that evenly distributes fat molecules throughout water-based ingredients—proves indispensable for achieving silky texture. Egg yolks excel at this task, functioning as natural emulsifiers while contributing richness and body. Each yolk contains lecithin, which essentially acts as a peacemaker between fat and water molecules that would otherwise separate.
Air Incorporation: The Invisible Ingredient
The churning process introduces crucial air bubbles into your mixture, preventing it from freezing into a solid block while creating that characteristic lightness. Premium ice creams typically incorporate 25-30% air by volume—enough to maintain scoopability without seeming overly inflated.
Sugar’s Secret Role
Beyond sweetening your creation, sugar molecules disrupt ice crystal formation, essentially lowering the freezing point of your mixture. This ensures your finished product remains pleasantly firm rather than transformingly into an impenetrable frozen mass.
Essential Equipment for Making Creamy Mint Chocolate Chip Ice Cream
While passion certainly matters, proper tools significantly impact your results. Consider these equipment essentials before embarking on your frozen adventure:
- Ice cream maker – Whether you choose a pre-freeze bowl model ($30-$70), salt-and-ice style ($25-$40), or compressor machine ($200-$300), mechanical churning produces superior texture compared to no-churn methods
- Digital thermometer – Precise temperature monitoring ensures custard bases reach their optimal 170-175°F without crossing into scrambled egg territory
- Heavy-bottomed saucepan – Distributes heat evenly to prevent scorching your precious base
- Fine-mesh strainer – Removes any accidentally coagulated egg particles and mint leaf remnants
- Silicone spatula – Gently folds ingredients without incorporating excessive air prematurely
- Freezer-safe storage container – Shallow, wide containers facilitate even freezing and easier scooping
Fresh vs. Extract: The Mint Debate for Authentic Flavor
The mint flavor decision fundamentally shapes your ice cream’s personality. Both approaches yield delicious results but create distinctly different taste experiences.
Fresh mint leaves infuse your base with garden-bright complexity that commercial products simply cannot replicate. When steeped in warm cream, these leaves release essential oils containing over 40 flavor compounds, creating a multi-dimensional mint experience with subtle herbaceous notes. This method requires additional preparation time (approximately 30-45 minutes for steeping plus cooling time) but rewards patience with extraordinary depth.
Mint extract offers precision and convenience. Just a teaspoon transforms your base instantly, providing that familiar cooling sensation while maintaining consistency across batches. Quality varies dramatically between brands, so seek pure extracts rather than artificial flavorings whenever possible.
Some devoted ice cream artisans take a hybrid approach, using both fresh mint infusion and a small amount of extract to capture the best aspects of both methods. Experimentation leads to personal perfection.
Premium Ingredients: The Foundation of Extraordinary Mint Chocolate Chip Ice Cream
The Dairy Base
Your dairy selection forms the backbone of your creation. Heavy cream delivers maximum creaminess but can overwhelm delicate mint flavors if used exclusively. Most professional recipes employ a balanced ratio of heavy cream to whole milk—typically 2:1—creating richness while preserving flavor clarity.
For those navigating dietary restrictions, several alternatives perform admirably:
- Coconut cream produces exceptional richness with a subtle tropical undertone that surprisingly complements mint
- Cashew cream offers neutral creaminess for those avoiding coconut flavor
- Commercial oat-based heavy cream alternatives maintain impressive texture without dominating the flavor profile
Sweetener Selection
While granulated sugar remains the standard, alternative sweeteners influence both flavor and texture:
- Honey contributes floral notes that enhance fresh mint infusions
- Pure maple syrup introduces complexity that pairs wonderfully with darker chocolate varieties
- Corn syrup (not high-fructose) increases smoothness by preventing crystallization
- Alternative sweeteners require recipe adjustments due to their impact on freezing properties
Chocolate Considerations
The chocolate component deserves careful consideration, as its characteristics transform dramatically once frozen. Finer pieces distribute more evenly throughout your ice cream, while larger chunks provide satisfying texture contrast. However, chocolate hardens considerably at freezing temperatures, so extremely large pieces may become uncomfortably rigid.
Chocolate quality matters tremendously. Higher cocoa butter content creates pieces that retain pleasant texture even when frozen, while lower-quality chocolate can become brittle and waxy. For traditional mint chocolate chip, semi-sweet varieties (around 60% cocoa) provide optimal balance.
Creating your own chocolate pieces yields superior results compared to using pre-made chips. Simply melt quality chocolate, spread thinly on parchment paper, freeze briefly, then break into irregular shards or chop to your preferred size.
Step-by-Step Recipe: Classic Creamy Mint Chocolate Chip Ice Cream
Ingredients

| Ingredient | Quantity | Notes |
|---|---|---|
| Heavy cream | 2 cups | 36% fat content preferred |
| Whole milk | 1 cup | Organic if possible |
| Granulated sugar | 3/4 cup | Divided (1/2 cup + 1/4 cup) |
| Egg yolks | 5 large | Room temperature |
| Fresh mint leaves | 2 cups, packed | Or 1-1.5 tsp mint extract |
| Salt | 1/4 teaspoon | Enhances flavor |
| Vanilla extract | 1/2 teaspoon | Complements mint |
| Semi-sweet chocolate | 6 ounces | Chopped into small chunks |
| Green food coloring (optional) | Few drops | For traditional appearance |
Preparation Method
- Infuse the dairy mixture with mint Begin by combining cream, milk, and half the sugar (1/2 cup) in a medium saucepan. Add a pinch of salt and warm over medium-low heat until steam appears, but before boiling begins. Remove from heat, add fresh mint leaves, cover, and allow to steep for 30-45 minutes. (If using extract instead of fresh mint, skip the steeping and add extract later.)
- Create the custard base In a separate bowl, whisk egg yolks with remaining sugar (1/4 cup) until the mixture lightens in color and appears satiny. Rewarm the mint-infused dairy mixture if it has cooled significantly, then slowly add about 1/2 cup of warm cream to the egg yolks while whisking constantly. This “tempers” the eggs, preventing scrambling. Gradually add the tempered egg mixture back into the saucepan while stirring continuously.
- Cook the custard properly Heat the mixture over medium-low heat, stirring constantly with a silicone spatula. Pay careful attention as the mixture thickens, which typically takes 5-7 minutes. The custard has reached perfect consistency when it coats the back of your spatula and maintains a clear line when you draw your finger across it. For precision, aim for 170-175°F on an instant-read thermometer.
- Strain and cool the mixture Immediately strain the custard through a fine-mesh sieve into a clean bowl, pressing gently on the mint leaves to extract maximum flavor. At this point, add vanilla extract and mint extract (if using instead of fresh mint). If you desire the classic green color, add a few drops of food coloring. Cover with plastic wrap directly touching the surface (preventing skin formation) and refrigerate until completely chilled, preferably overnight.
- Prepare the chocolate pieces While the base chills, melt chocolate using a double boiler or microwave in short bursts, stirring frequently. Spread melted chocolate thinly on parchment paper and refrigerate until firm. Chop into small pieces or irregular shards according to your preference.
- Churn the ice cream Pour the thoroughly chilled base into your ice cream maker and churn according to manufacturer instructions, typically 20-25 minutes. The mixture should reach soft-serve consistency.
- Incorporate the chocolate In the final minute of churning, add the chocolate pieces through the machine’s opening, allowing them to distribute evenly. Alternatively, fold them gently into the finished soft ice cream using a spatula.
- Final freezing Transfer the churned ice cream to a freezer-safe container. Press parchment paper directly onto the surface before sealing to prevent ice crystallization. Freeze for at least 4 hours or overnight for ideal scooping consistency.
Quick No-Churn Mint Chocolate Chip Ice Cream Alternative
When time constraints or equipment limitations prevent traditional churning, this simplified version delivers surprisingly impressive results.
Ingredients
| Ingredient | Quantity | Notes |
|---|---|---|
| Sweetened condensed milk | 14 oz can | Room temperature |
| Heavy whipping cream | 2 cups | Very cold |
| Mint extract | 1 teaspoon | Or to taste |
| Vanilla extract | 1/2 teaspoon | Balances flavor |
| Salt | Pinch | Enhances sweetness |
| Green food coloring (optional) | Few drops | For traditional color |
| Mini chocolate chips | 1 cup | Or chopped chocolate |
No-Churn Method
- Pour sweetened condensed milk into a large bowl and add mint extract, vanilla extract, salt, and food coloring if desired. Stir until completely combined.
- In a separate bowl, whip the heavy cream until stiff peaks form. Be careful not to over-whip, which causes graininess.
- Gently fold whipped cream into the condensed milk mixture using a spatula, maintaining as much air as possible while ensuring complete incorporation.
- Fold in chocolate chips or pieces until evenly distributed.
- Transfer to a freezer-safe container, cover, and freeze for at least 6 hours or overnight until firm.
Troubleshooting Guide: Common Issues When Making Mint Chocolate Chip Ice Cream

Even experienced ice cream makers occasionally face challenges. Here’s how to overcome the most frequent obstacles:
Problem: Icy texture instead of creamy
- Potential causes: Insufficient fat content, inadequate emulsification, improper sugar balance, over-churning introducing too much air
- Solutions: Increase cream-to-milk ratio, add an extra egg yolk, ensure thorough chilling before churning, stop churning when mixture reaches soft-serve consistency
Problem: Overpowering mint flavor
- Potential causes: Excessive steeping time with fresh mint, too much extract
- Solutions: Reduce steeping time to 20-30 minutes, add extract gradually (starting with half the recommended amount)
Problem: Chocolate that’s too hard when frozen
- Potential causes: Chocolate pieces too large, chocolate with low cocoa butter content
- Solutions: Chop chocolate more finely, select chocolate with higher cocoa butter percentage, add tiny amount (1 tsp) of neutral oil to melted chocolate before freezing
Problem: Ice cream that’s too soft or melts too quickly
- Potential causes: Insufficient freezing time, improper sugar balance, alcohol content from vanilla extract
- Solutions: Freeze longer (8+ hours), slightly reduce sugar if using alternative sweeteners, ensure serving temperature remains below 10°F
Creative Variations on Classic Mint Chocolate Chip Ice Cream
Once you’ve mastered the classic version, consider these exciting variations:
Dark Chocolate Mint Chip Substitute bittersweet chocolate (70%+ cocoa) for a sophisticated flavor profile with less sweetness and more complexity.
White Chocolate Mint Chip Replace semi-sweet with quality white chocolate for a creamier, more indulgent experience where mint truly shines.
Cookies and Mint Ice Cream Fold crushed chocolate cookies into your mint base instead of traditional chocolate pieces for added texture and chocolatey goodness.
Mint Chocolate Brownie Swirl Prepare your mint chocolate chip ice cream, then swirl in ribbons of fudge sauce and small brownie pieces during the final packing stage.
Vegan Mint Chocolate Chip Substitute full-fat coconut milk and coconut cream for dairy, use cornstarch instead of eggs as a thickener, and select dairy-free chocolate pieces.
Serving and Storage Tips for Homemade Mint Chocolate Chip Ice Cream
For the ultimate serving experience, remove your creation from the freezer approximately 5-7 minutes before scooping. This brief tempering period allows the ice cream to soften slightly, enhancing both scoopability and flavor perception—frozen taste buds detect less nuance.
Store homemade ice cream in shallow, wide containers rather than deep tubs. This configuration minimizes freeze-thaw cycles when you remove portions. Press parchment directly onto the surface after each serving to prevent air exposure.
Properly stored homemade mint chocolate chip ice cream maintains optimal quality for about two weeks, though texture gradually deteriorates after the first week as ice crystals naturally form.
For special occasions, consider these perfect pairings:
- Warm brownies create magnificent temperature contrast
- Thin chocolate wafer cookies offer textural complement
- Fresh berries provide bright counterpoint to cool mint
- Hot fudge sauce transforms a simple scoop into an elegant sundae
Conclusion
Creating truly magnificent mint chocolate chip ice cream at home transcends mere recipe following—it’s an artform that blends science, quality ingredients, and personal preference. The journey from simple ingredients to that first heavenly spoonful delivers satisfaction that commercially produced varieties simply cannot match.
By mastering the principles explored here—proper fat content, emulsification techniques, ingredient selection, and churning methods—you’ve gained the knowledge to produce ice cream rivaling premium scoop shops. Your friends and family will marvel at the difference between your homemade creation and mass-produced alternatives, often unable to articulate precisely why yours tastes so much better. (You’ll know it’s your attention to detail and quality ingredients!)
Now, armed with understanding and technique, venture forth into your kitchen and transform simple ingredients into frozen perfection. Your mint chocolate chip masterpiece awaits creation—and with each batch, you’ll refine your approach until you’ve discovered your personal ideal. What could possibly taste sweeter than that?
Ready to elevate your homemade dessert game even further? Share your mint chocolate chip creations on social media with #HomemadeIceCreamMaster or join our newsletter for monthly frozen inspiration. Your ice cream journey has just begun!
Frequently Asked Questions About Homemade Mint Chocolate Chip Ice Cream
How do I make mint chocolate chip ice cream extra creamy?
The secret to extraordinary creaminess lies in five key factors: use a higher fat content (minimum 2:1 cream-to-milk ratio), include adequate egg yolks (5-6 per quart), ensure thorough emulsification during cooking, avoid over-churning which introduces excessive air, and store at the proper temperature (ideally around 0°F/-18°C). Additionally, adding a tablespoon of alcohol (vodka or creme de menthe) prevents overly hard freezing.
Can I make mint chocolate chip ice cream without an ice cream maker?
Absolutely! The no-churn method outlined above delivers impressive results by utilizing whipped cream to incorporate air and sweetened condensed milk to prevent crystallization. For even better texture, stir the mixture every 30 minutes during the first 2 hours of freezing to break up ice crystals, then allow it to freeze completely.
Why is my homemade mint chocolate chip ice cream too icy?
Iciness typically results from insufficient fat, inadequate emulsification, or improper storage. Increase your cream ratio, add an extra egg yolk, ensure your base reaches proper custard consistency before chilling, and store in shallow containers with parchment paper pressed against the surface to prevent freezer burn.
How long does homemade mint chocolate chip ice cream stay fresh?
Properly stored in an airtight container with minimal air exposure, your creation maintains peak quality for about two weeks. After this period, ice crystals naturally form, gradually diminishing texture. For optimal enjoyment, consume within 7-10 days of production.
What’s the best chocolate to use in mint chocolate chip ice cream?
Semi-sweet chocolate containing 55-65% cocoa solids provides ideal balance with mint flavors. Higher cocoa percentages maintain better texture when frozen due to increased cocoa butter content. Quality matters significantly—choose chocolate you’d enjoy eating plain rather than baking chips containing stabilizers.
Can I use fresh mint from my garden for mint chocolate chip ice cream?
Garden-fresh mint creates extraordinary ice cream with complex flavor. Different mint varieties (peppermint, spearmint, chocolate mint) each impart unique characteristics. For best results, use young, vibrant leaves and increase quantity by 20-30% compared to store-bought mint. Steep leaves in warm cream until pronounced flavor develops, typically 30-45 minutes, then taste and adjust steeping time for your preferred intensity.
Is it possible to make creamy mint chocolate chip ice cream that’s dairy-free?
Definitely! Replace dairy with full-fat coconut milk and coconut cream (2:1 ratio), use 2-3 tablespoons cornstarch instead of eggs for thickening, and select dairy-free chocolate. These substitutions maintain exceptional creaminess while accommodating dietary preferences. Cashew-based alternatives also perform admirably for those avoiding coconut flavor.
