Table of Contents
Remember that moment when you first cracked open a chocolate fondant, and the warm, molten center oozed onto your plate? That perfect blend of cake-like exterior giving way to a river of liquid chocolate pleasure? There’s something magical about serving a dessert that makes your guests gasp with delight. The good news? You don’t need professional training to create this show-stopping finale at your next dinner party. This step-by-step guide will walk you through creating perfect chocolate fondants every time – with just 5 simple steps and ingredients you likely already have in your pantry.
The Magic of Chocolate Fondant
Few desserts carry the dramatic flair of a chocolate fondant. When your spoon breaks through that tender exterior to release the molten center, it creates a moment of pure culinary theater. This beloved treat goes by several names across the globe – lava cake in America, moelleux au chocolat in France – but the experience remains universally cherished.
- Bist Amazon Picks:
The chocolate fondant rose to prominence in the 1980s and has maintained its status as a restaurant staple ever since. While debates continue about whether renowned chef Jean-Georges Vongerichten accidentally invented it by removing a chocolate cake from the oven too soon, or if it was a deliberate French creation, one thing remains certain: this dessert continues to captivate diners worldwide.
What many home bakers don’t realize is that behind this seemingly complicated dessert lies a surprisingly straightforward recipe. The fondant’s “magic” happens naturally during baking – the exterior cooks while the center remains deliberately undercooked, creating that signature molten effect. With precise timing and temperature control, you’ll master this impressive dessert in no time.
Essential Ingredients for Perfect Chocolate Fondant
The beauty of chocolate fondant lies partly in its simplicity. With just a handful of quality ingredients, you’ll create something truly extraordinary. Let’s explore what you’ll need:
Ingredients Table

| Ingredient | Quantity | Notes |
|---|---|---|
| High-quality dark chocolate | 200g | 70% cocoa solids recommended |
| Unsalted butter | 200g | Room temperature |
| Eggs | 4 large | Room temperature |
| Egg yolks | 4 | For extra richness |
| Granulated sugar | 120g | Can be adjusted for sweetness |
| All-purpose flour | 2 tbsp | Just enough for structure |
| Salt | Pinch | Enhances chocolate flavor |
| Vanilla extract | 1 tsp | Optional but recommended |
Choosing the Right Chocolate
When it comes to chocolate fondant, your chocolate selection matters tremendously. This dessert is essentially a celebration of chocolate, so choose wisely. Opt for chocolate with 60-70% cocoa solids for the perfect balance of sweetness and depth. Brands like Valrhona, Guittard, or Ghirardelli deliver excellent results, but any high-quality chocolate will work beautifully.
The higher cocoa percentage provides those complex, nuanced flavors that elevate your fondant beyond ordinary chocolate desserts. While milk chocolate fans might be tempted to substitute, resist that urge – milk chocolate’s lower melting point and different composition will throw off the delicate texture balance of your fondant.
If dark chocolate feels too intense for your preference, consider using a 55-60% cocoa chocolate rather than dipping into milk chocolate territory. The additional sugar, butter, and egg yolks in the recipe will temper any bitterness, creating a perfectly balanced result.
Equipment You’ll Need
Before embarking on your chocolate fondant adventure, gather these essential tools:
- Ramekins or molds: Traditional 3-inch (7.5cm) ramekins work perfectly, though specialty fondant molds are available. Whatever you choose, ensure they can withstand high oven temperatures.
- Baking tray: To support your ramekins and facilitate easy transfer in and out of the oven.
- Mixing bowls: Glass or metal bowls work well, especially for melting chocolate over simmering water.
- Electric mixer: While not absolutely necessary (whisking by hand is possible), an electric mixer makes achieving the right egg consistency much easier.
- Parchment paper: For lining molds or creating collars for higher fondants.
- Cooking spray or butter: For thoroughly greasing your molds to ensure clean release.
- Kitchen thermometer: Optional but helpful for precise chocolate melting.
Having everything prepared before you begin will transform this into a stress-free baking experience. Remember, chocolate fondant requires some precision, so proper equipment ensures consistent results.
5 Easy Steps to Chocolate Fondant Perfection
Step 1: Preparation is Key
Begin by preheating your oven to exactly 180°C (350°F). Precision matters tremendously with chocolate fondant, so if possible, use an oven thermometer to verify the temperature. An oven that runs too hot will overcook your fondants, destroying that coveted molten center.
Next, prepare your ramekins meticulously. This step significantly impacts your ability to turn out beautiful fondants later. First, thoroughly butter the inside of each ramekin, ensuring every crevice is covered. Then dust lightly with cocoa powder (not flour, which would leave visible white traces) and tap out any excess.
For an additional insurance policy against sticking, cut small rounds of parchment paper to fit the bottoms of your ramekins. This extra step takes just moments but can save your dessert presentation later.
Arrange all your measured ingredients in the order you’ll use them. This “mise en place” approach prevents mid-recipe scrambling and helps ensure nothing gets overlooked. If time allows, bring refrigerated ingredients to room temperature – particularly the eggs, which incorporate better when not cold.
Step 2: The Perfect Chocolate-Butter Base
Creating the foundation of your chocolate fondant requires careful attention. Begin by chopping your chocolate into small, uniform pieces to ensure even melting. Place the chocolate and butter in a heatproof bowl.
You have two melting methods to choose from:
Bain-marie method (recommended): Place your bowl over a pot of gently simmering water, ensuring the bottom doesn’t touch the water. Stir occasionally until completely melted and glossy. This method provides gentle, even heat that prevents scorching.
Microwave method: If short on time, place chocolate and butter in a microwave-safe bowl and heat in 30-second intervals at 50% power, stirring between each interval until nearly melted. Let the residual heat complete the melting process while stirring.
Whichever method you choose, avoid these common pitfalls:
- Never let water contact your chocolate (causes seizing)
- Don’t overheat (leads to graininess)
- Stop heating when a few small pieces remain and let residual heat finish the job
Allow your chocolate mixture to cool slightly before proceeding – it should feel warm but not hot to the touch. If it’s too hot when adding to eggs, you’ll end up with chocolate scramble rather than fondant batter.
Step 3: Creating the Batter
While your chocolate cools slightly, focus on achieving the perfect egg mixture. In a separate bowl, combine your eggs, egg yolks, and sugar. This step creates the structural foundation that balances your fondant between cake and molten goodness.
Using an electric mixer, whip this mixture until it reaches the “ribbon stage” – when the mixture falls back into the bowl in thick ribbons that briefly hold their shape before dissolving. This typically takes 3-5 minutes of vigorous mixing. The mixture should nearly triple in volume and turn a pale yellow.
This incorporation of air is crucial – it provides the delicate structure that will form your fondant’s exterior while allowing the center to remain luxuriously molten.
Once your egg mixture reaches the perfect consistency, gently fold in your cooled chocolate-butter mixture. Use a spatula and a figure-eight motion, turning the bowl as you go. The goal is incorporation without deflating the air you’ve carefully whipped in.
After the chocolate is incorporated, sift your flour and salt directly over the mixture and fold again using the same gentle technique. Add the vanilla if using. Your final batter should have a mousse-like consistency – light yet rich, with no streaks of flour visible.
Visual cues that indicate your batter is perfect include:
- A uniform chocolate color with no streaks
- A texture that flows slowly when poured
- A slight glossiness on the surface
- Enough body to hold its shape momentarily when dropped from a spoon
Step 4: Filling and Baking
With your perfect batter prepared, it’s time for the most critical phase – filling and baking your fondants. This step determines whether you’ll achieve that coveted molten center or end up with chocolate cake.
Carefully divide your batter among the prepared ramekins, filling each about three-quarters full. This provides enough room for some rising without overflow. Tap each ramekin gently on the counter to remove any large air bubbles.
Place your filled ramekins on a baking tray and transfer to the middle rack of your preheated oven. Now comes the moment of truth – timing. For standard 3-inch ramekins, bake for exactly 12 minutes. The surface should be set and spring back slightly when touched, but the center should still feel soft.
Bear in mind that various factors can affect baking time:
- If using smaller ramekins, reduce time by 1-2 minutes
- If using larger molds, add 1-2 minutes
- If batter was refrigerated, add 1-2 minutes
- If your oven runs hot or cold, adjust accordingly
When removed from the oven, your fondants will continue cooking from residual heat, so precise timing is essential. Let them rest for exactly 1 minute before turning out – this brief resting period allows the structure to stabilize just enough for successful unmolding.
Step 5: Serving with Flair
The final step transforms your creation from merely delicious to truly memorable. To turn out your fondants, run a thin knife around the edge of each ramekin to loosen. Place a dessert plate upside down on top of the ramekin, then quickly invert both together. Wait a few seconds, then gently lift the ramekin. Your fondant should release easily onto the plate.
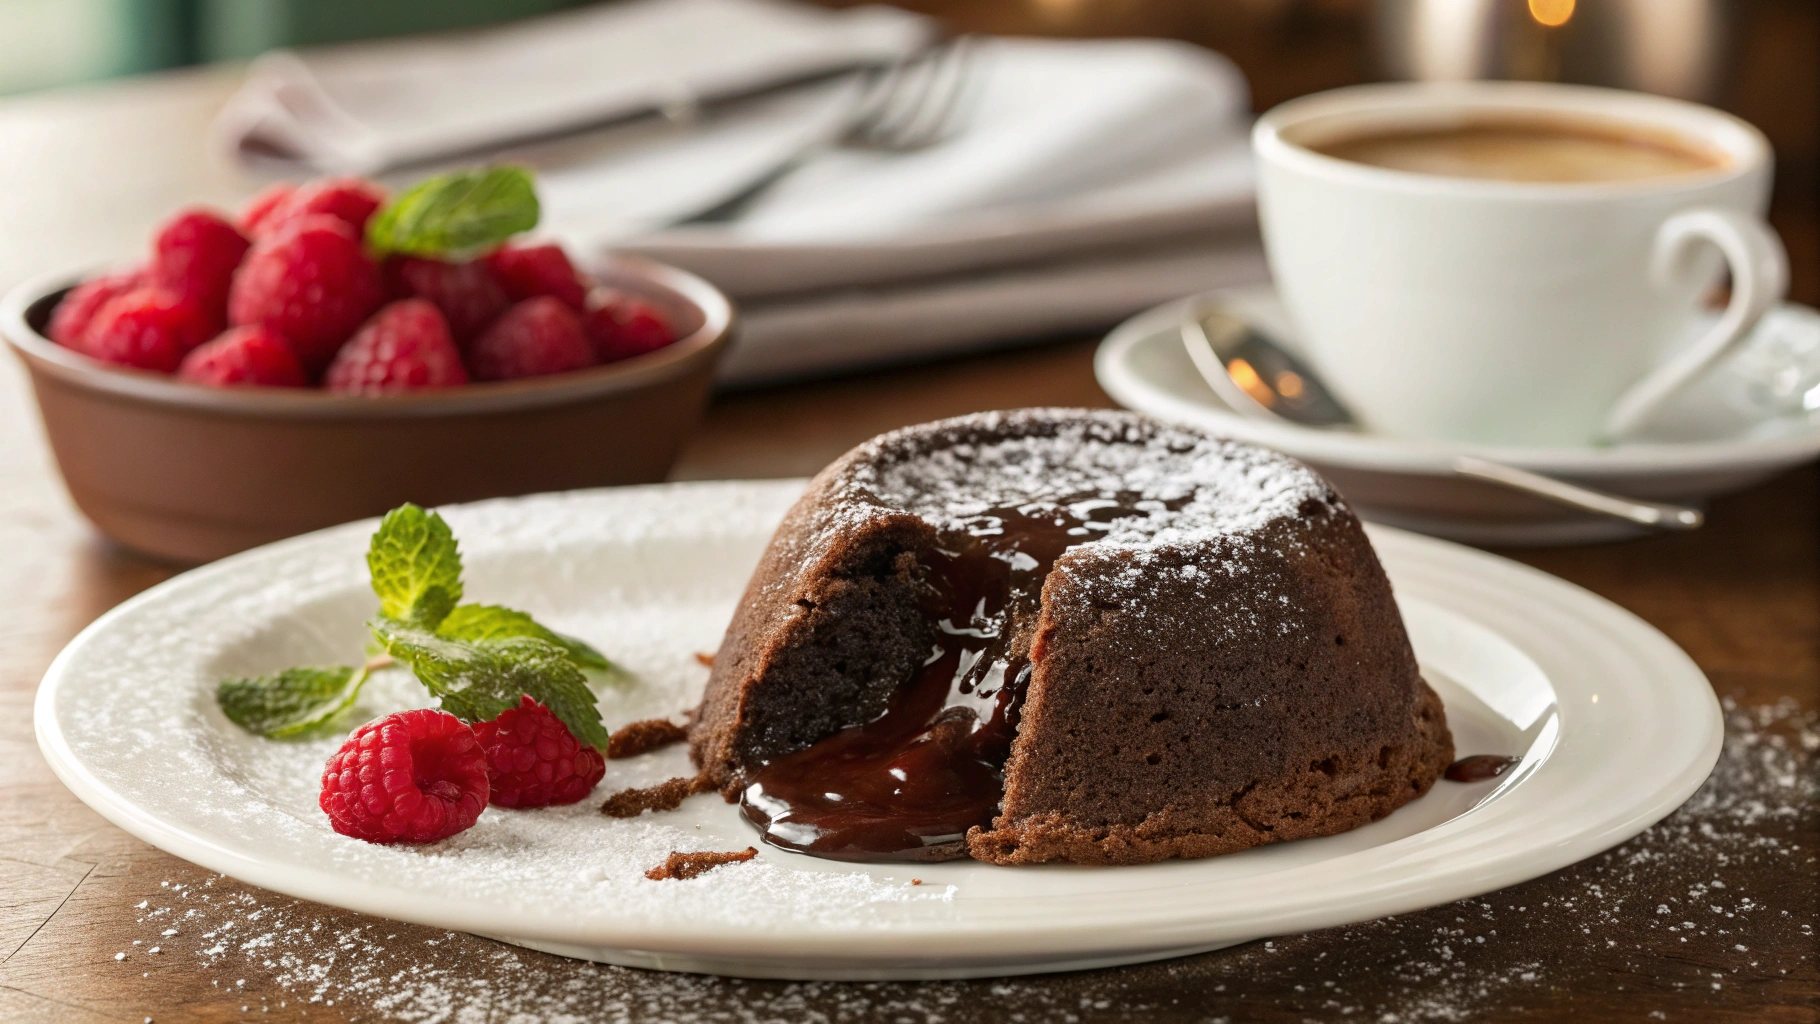
For maximum visual impact, consider these serving suggestions:
- Dust with powdered sugar just before serving for a snow-capped effect
- Add a small quenelle of vanilla ice cream alongside for temperature contrast
- Place fresh raspberries or sliced strawberries for color and acidity
- Drizzle with a complementary sauce like salted caramel or raspberry coulis
- Add a sprig of mint for a touch of color
The perfect chocolate fondant deserves to be enjoyed immediately. The contrast between the warm cake exterior and flowing chocolate center diminishes with each passing minute, so gather your guests for the grand reveal.
Make-Ahead Tips for Stress-Free Entertaining

One of the greatest advantages of chocolate fondant is that the batter can be prepared well in advance, making it perfect for entertaining. You can:
- Prepare the batter up to 24 hours ahead and store in a covered bowl in the refrigerator
- Fill ramekins up to 6 hours ahead and refrigerate, covered with plastic wrap
- Freeze filled ramekins for up to 1 month, well-wrapped to prevent freezer burn
When baking from refrigerated, allow the ramekins to sit at room temperature for 30 minutes before baking, or add 1-2 minutes to the baking time. For frozen fondants, bake directly from frozen, adding approximately 3-4 minutes to the standard baking time.
This make-ahead capability transforms what seems like a sophisticated last-minute dessert into a stress-free conclusion to your dinner party. You can focus on enjoying your guests while knowing a show-stopping dessert awaits with minimal effort.
Common Troubleshooting
Even experienced bakers occasionally encounter challenges with chocolate fondant. Here’s how to overcome common issues:
Problems and Solutions
Fondant overcooked (no liquid center)
- Your oven may run hot – reduce temperature by 10°C next time
- Baking time was too long – reduce by 1-2 minutes
- Ramekins were too small, cooking batter faster – adjust time accordingly
- Solution: Serve with ice cream or sauce to compensate for dryness
Fondant undercooked (completely liquid)
- Oven temperature too low – verify with oven thermometer
- Insufficient baking time – add 1-2 minutes next attempt
- Batter too cold when baking – allow to reach room temperature
- Solution: Spoon into bowls and rebrand as “chocolate soup” with ice cream
Sticking to the ramekin
- Insufficient greasing – be more thorough next time
- Ramekins not dusted properly – use cocoa powder liberally
- Turned out too quickly – allow 1-minute rest after baking
- Solution: If salvageable, cover imperfections with powdered sugar or sauce
Collapsed fondant after turning out
- Batter overmixed, destroying structure – fold more gently next time
- Insufficient flour – measure carefully
- Turned out too roughly – invert with more care
- Solution: Press down gently to create an intentional “sunken treasure” effect and fill center with berries
Variations to Try
Once you’ve mastered the classic chocolate fondant, consider these delicious variations:
White chocolate fondant: Replace dark chocolate with quality white chocolate, reduce sugar to 100g, and add 1 tbsp more flour for structure. The visual impact of cutting into a white exterior to reveal a creamy center offers a stunning variation.
Flavor infusions: Enhance your chocolate fondant by adding complementary flavors:
- Orange zest and Grand Marnier create chocolate-orange fondant
- Espresso powder transforms it into mocha fondant
- Mint extract or crushed peppermint offers refreshing contrast
- Cinnamon and cayenne pepper introduce warmth with a subtle kick
Gluten-free adaptation: Simply substitute the all-purpose flour with the same quantity of gluten-free flour blend. Add 1/4 teaspoon of xanthan gum if your blend doesn’t already contain it for structural support.
Vegan chocolate fondant: Though challenging given the structural importance of eggs, vegan versions can succeed using:
- Aquafaba (chickpea liquid) whipped to stiff peaks as egg replacement
- Plant-based butter substitute
- High-quality dark chocolate (many dark chocolates are naturally vegan)
- A slight increase in flour (1 extra tablespoon) for structural support
Nutritional Information and Health Considerations
Let’s be honest – chocolate fondant is an indulgence, but understanding its nutritional profile helps you enjoy it mindfully:
Each standard chocolate fondant typically contains:
- Approximately 380-450 calories
- 25-30g fat (mostly from chocolate and butter)
- 35-40g carbohydrates
- 6-8g protein
- Significant amounts of iron and antioxidants (from dark chocolate)
For those with dietary concerns:
- Portion control: Consider using smaller ramekins for “tasting” portions
- Lighter options: Reduce butter by up to 25% with minimal texture impact
- Sugar alternatives: Coconut sugar or monk fruit sweetener can replace granulated sugar
- Allergen awareness: Contains dairy, eggs, and gluten in traditional recipes
Conclusion
Creating the perfect chocolate fondant doesn’t require culinary school training—just attention to detail and these five straightforward steps. Once you master this technique, you’ll have a show-stopping dessert in your repertoire that’s guaranteed to impress. Remember, practice makes perfect, so don’t be discouraged if your first attempt isn’t flawless. Each time you make this decadent dessert, you’ll gain confidence and finesse.
The true beauty of chocolate fondant lies in its ability to create moments of pure pleasure. That anticipatory pause as the spoon breaks through the surface, the satisfying flow of molten chocolate, and the first heavenly bite – these are the experiences that transform a meal into a memory.
Why not gather your ingredients today and embark on your chocolate fondant journey? With this guide in hand, you’re fully equipped to create restaurant-quality desserts in your own kitchen. Your dinner guests will be talking about your culinary prowess for weeks to come!
Frequently Asked Questions About Chocolate Fondant
Can I make chocolate fondant without ramekins?
Yes, you can use muffin tins as an alternative to traditional ramekins for baking your chocolate fondant. Just be sure to adjust the baking time accordingly, as muffin tins may conduct heat differently. Line each cup with a paper liner that’s been thoroughly greased for easier removal.
Why did my chocolate fondant not have a liquid center?
The most common reason for a chocolate fondant lacking its signature molten center is overbaking. Even one minute too long can transform your fondant into a brownie. Follow our precise timing in Step 4 for perfect chocolate fondant results every time. Remember that oven temperatures vary, so you might need to experiment once to find the exact timing for your equipment.
Can chocolate fondant be prepared in advance?
Absolutely! The batter for chocolate fondant can be prepared up to 24 hours in advance and refrigerated. Just bring it back to room temperature before baking or add 1-2 minutes to the baking time if cooking directly from the refrigerator. This make-ahead capability makes chocolate fondant an excellent choice for entertaining.
Are chocolate fondant and lava cake the same dessert?
Yes, chocolate fondant and chocolate lava cake refer to essentially the same dessert—a cake with a firm exterior and molten center. The term “fondant” is more commonly used in Europe, while “lava cake” is the popular name in North America. Regardless of what you call it, the technique and delicious result remain the same.
What’s the best chocolate to use for chocolate fondant?
For the most flavorful chocolate fondant, use high-quality dark chocolate with 60-70% cocoa solids. The intensity of the chocolate directly impacts the depth of flavor in your final dessert. Remember that chocolate is the star ingredient here, so selecting the finest quality your budget allows will yield the most impressive results.
Can I reheat leftover chocolate fondants?
While chocolate fondants are best enjoyed fresh from the oven, leftovers can be gently reheated. Place them in a preheated 160°C (320°F) oven for about 5 minutes, or microwave on 50% power for 20-30 seconds. The reheated version won’t have quite the same dramatic molten center, but will still taste delicious.
